Table of Contents
Are you ready to take on your next home project? Whether you’re updating your space or installing flooring for the first time, floating a wood floor is a fantastic DIY solution that can enhance the beauty of your home and potentially increase its value. But before you begin, it’s essential to understand the steps involved to ensure a successful project.
Understand What You’re Getting Into
Embarking on the journey of installing a floating wood floor is an exciting one. That said, it’s not without its fair share of demands. Unlike its nailed or glued counterparts, a floating wood floor sits freely on the subfloor, earning it favor among DIY enthusiasts. However, it’s critical to be aware of the level of commitment this project entails.
The installation process can be labor-intensive, requiring a keen eye for detail, physical endurance, and a good deal of patience. You should be ready to invest a considerable amount of time into this project – a few hours to a few days, contingent on the room’s dimensions. It’s essential to know these elements ahead of time, so you can approach the project fully prepared.
1. Choose Your Flooring Material
Deciding on the right flooring material is a vital step in the installation of your floating wood floor. Options abound, ranging from laminate, engineered hardwood, to luxury vinyl planks. Each one carries its unique attributes and downsides. When making your selection, your budget, the room’s function, and your personal aesthetic should guide your decision. You may find it helpful to take a trip to your local home improvement store to explore the various flooring options in person.
Alternatively, you can request samples to be delivered to your home, enabling you to see how each material looks under your home’s lighting conditions. Your choice will significantly impact the final look and feel of your room, so take the time to consider all your options carefully.
2. Prepare Your Subfloor
An integral step before diving into the installation of your floating wood floor is to ensure your subfloor is ready for the task. The subfloor should be devoid of any dust, debris, and must be completely dry. An uneven subfloor could lead to an unstable and squeaky final result, so it’s essential to make sure it’s level. High spots on the subfloor can be ground down, and for any depressions, a leveling compound will do the trick. Any remnants of previous flooring or adhesive should be thoroughly scraped off since these could affect how seamlessly your new flooring settles. Taking the time to prepare your subfloor properly will set the foundation for a smooth and successful flooring installation.
3. Gather Your Tools and Materials in order to install Floating Wood Floor
It’s crucial to have all your tools and materials in one place before commencing your floating wood floor installation. For this task, you’ll require your pre-selected flooring, underlayment, a tape measure for accurate sizing, a chalk line for alignment, a utility knife for cutting the underlayment, a pry bar, and a rubber mallet for fitting the planks snugly. For trimming the planks to the correct size, you’ll need a miter saw or a circular saw. If you don’t have these in your toolkit, consider renting from a nearby home improvement store. Having all your tools and materials ready and within arm’s reach not only streamlines the installation process but also minimizes potential errors.
4. Lay Your Underlayment
Your next step involves laying down the underlayment, a critical component of the floating floor system. Acting as a buffer, it provides a degree of cushioning, acts as a sound dampener and offers a protective moisture barrier. Begin by unrolling the underlayment across your thoroughly prepared subfloor, ensuring it covers the entire surface area. Use your utility knife to trim the material to the correct size, aligning it with the room’s boundaries. Most underlayments feature an adhesive strip for easy attachment to the subfloor, although some may require separate tape for secure fixation. Installing the underlayment properly ensures your floating wood floor will have the support it needs, paving the way for the next stage – plank installation.

5. Begin Installing the Planks
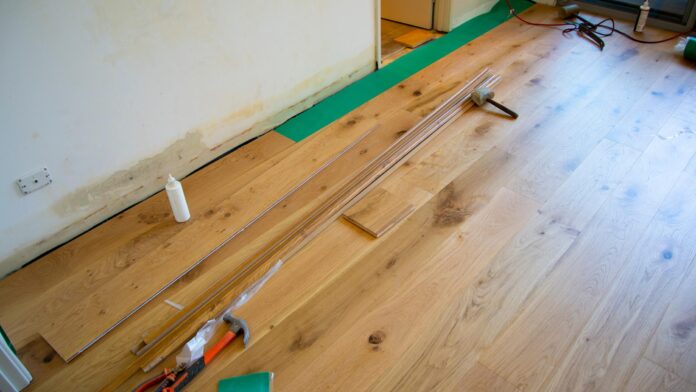
With your room primed and ready, it’s time to start laying your planks. Commence from one wall and methodically progress across the room. Ensure you stagger the joints between each plank to create a more visually appealing, natural appearance. Each plank is designed with a tongue on one side and a groove on the other, which conveniently fit into each other to form a seamless connection. To ensure a snug fit, use your rubber mallet to gently tap the planks into place, eliminating any potential gaps. Don’t forget to leave an expansion gap along the wall’s edge; this gives your floor room to expand and contract with changing temperatures and humidity levels, preventing potential warping or buckling.
6. Finish Your Floor Installation
After securing all your planks in place, the final touches to your floating wood floor installation involve adding baseboards or quarter round molding. These crucial elements camouflage the expansion gap you left around the edges of your room, providing a more polished look. Furthermore, you may require transition strips at the thresholds where your newly installed floating wood floor intersects with other flooring types. Carefully measure, cut, and secure these pieces in place.
Remember, precision is key to achieving a professional finish. These finishing touches don’t merely serve an aesthetic purpose but also protect your floor from damage, ensuring your work lasts. It’s these fine details that bring your project full circle, transforming your efforts into a functional and stylish addition to your home.
7. Maintenance and Care
Once your floating wood floor is successfully installed, its upkeep is a relatively straightforward task. Routine cleaning can be accomplished with a simple sweep or vacuum session, effectively keeping the surface clear of dust and debris. Be prompt in addressing any accidental spills to thwart potential water damage. For more thorough cleaning, a damp mop should suffice. However, refrain from using wet mops or steam cleaners as these could overly saturate the planks, leading to undesirable warping. The longevity of your newly installed floating wood floor lies in consistent and proper care.
With mindful maintenance, you can expect your stylish flooring to continue enhancing the aesthetic appeal of your home for many years. Your endeavor in installing a floating wood floor doesn’t just end with the installation – it extends to ensuring its lasting beauty through diligent upkeep. Enjoy the fruits of your DIY labor with this simple yet effective care routine!
Essential Toolkit for Floating Wood Floor Installation
For a successful DIY installation of a floating wood floor, having the right tools on hand is crucial. Below is a refined list of essential tools, each chosen for its role in ensuring a smooth, precise installation process. You can find these tools on Amazon or at your local hardware store:
- Flush Cut Dovetail Saw: Perfect for making precise, close cuts on wood. This saw allows for detailed work, such as trimming flooring edges without damaging adjacent surfaces.
- Miter Saw: A must-have for clean, accurate cuts, especially when working on angles or custom fitting pieces. Its precision is invaluable for creating a professional-looking finish.
- Circular Saw: Offers versatility and power for straight cuts. It’s ideal for cutting planks to length quickly and efficiently.
- Hammer: An essential tool for various tasks, including securing underlayment and gently tapping flooring planks into place.
- Flat Pry Bar: This tool is crucial for removing existing baseboards or molding and for wedging and adjusting planks during installation.
- Coping Saw: With its ability to make intricate cuts, the coping saw is perfect for fitting flooring around irregular shapes, like pipes or door frames.
- Nailset: Ensures a clean, professional finish by countersinking any nails or fasteners below the surface of the wood.
Safety Gear: Don’t forget to equip yourself with safety glasses, durable gloves, and ear protection to prevent any injuries during the installation process.

Additional Supplies:
- Measuring Tape: For accurate measurements of the room and flooring planks.
- Carpenter’s Square: Ensures your cuts are perfectly square for a seamless fit.
- Pencil: For marking precise cut lines on your flooring material.
With this comprehensive toolkit, you’re well-prepared to tackle the installation of your floating wood floor, achieving a professional and enduring result. Remember, taking the time to measure twice and cut once will save time and materials in the long run.


